7 Best Ways to Clean Golf Cart Seats and Upholstery?

Time:2026-09-19 Author:Aria
0%

Golf cart seats face more than ordinary dust. They collect sunscreen, grass clippings, muddy water, food crumbs, and sweat during every round. Because vinyl, fabric, and leather-like upholstery react differently, one cleaning method cannot suit every seat. Understanding how to clean golf cart seats and upholstery helps protect comfort, appearance, and material life.

A practical cleaning routine starts with inspection. Check seams, cracks, mildew spots, and loose stitching before applying water. Remove dry debris with a soft brush or vacuum attachment. Then test a mild soap solution on a hidden area. This small step matters. Strong chemicals may fade vinyl or weaken fabric fibers. A microfiber cloth, warm water, and gentle pressure usually provide a safer beginning. For stubborn marks, repeat the process instead of scrubbing aggressively. Patience works better.

I have learned that deep stains do not always disappear completely. That is worth admitting. Some discoloration has already penetrated the material. Still, careful cleaning can prevent further damage and improve the seat’s condition. The methods in this guide focus on practical tools, material-aware techniques, and sensible drying. They also explain when professional upholstery care may be safer than experimenting at home. Open the cart’s storage areas, clean around the seat brackets, and let every surface dry fully before riding. Small details often decide the result.
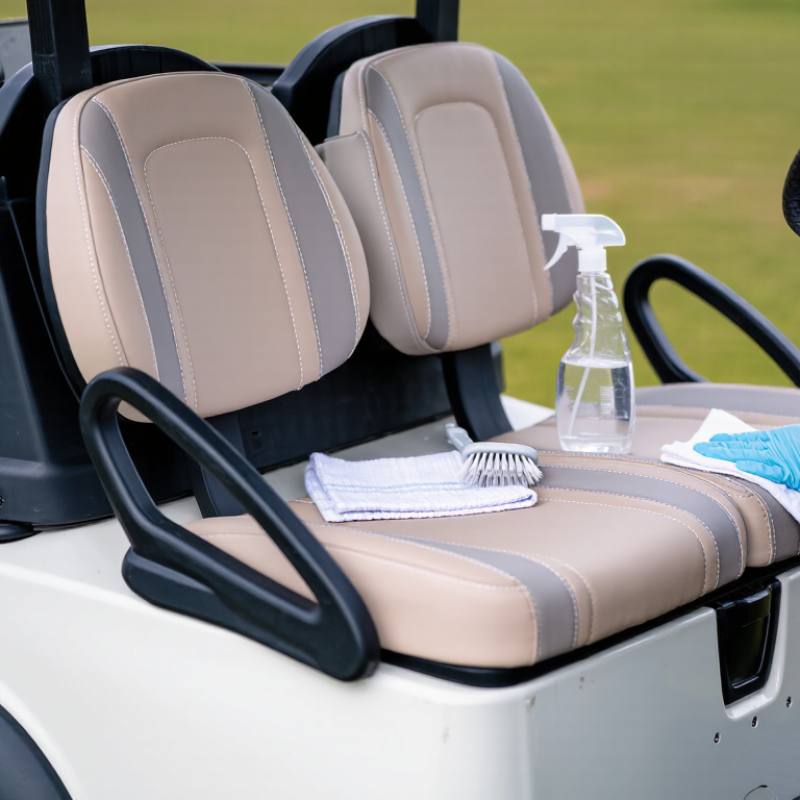
7 Best Ways to Clean Golf Cart Seats and Upholstery?

Identify Golf Cart Seat Materials and Follow Manufacturer Care Codes

Before cleaning golf cart seats, identify the upholstery material and locate its care code. Vinyl usually tolerates mild soap and water, while leather needs a suitable conditioner. Fabric seats may require low-moisture cleaning. Some covers show codes such as W, S, WS, or X, but meanings can vary by manufacturer. Check the sewn label, owner’s manual, or service documentation before applying anything.

Remove loose dust with a soft brush or vacuum attachment. Mix mild detergent with lukewarm water, then test it beneath the seat. Use a soft cloth and gentle strokes, especially around seams where dirt collects. Do not soak foam cushions. Excess moisture can create hidden odors and weaken the backing. For vinyl, wipe away cleaner promptly and dry the surface in shade. Harsh solvents, abrasive pads, and strong disinfectants may cause cracking or discoloration.

Tips: Never guess the care code. A small test area matters. I once used too much water on an outdoor cushion, and the seat stayed damp longer than expected. That mistake taught me to clean lightly and dry thoroughly. For unknown materials, photograph the label and ask a qualified upholstery professional before using a specialized cleaner. Inspect stitching, zippers, and mounting points during cleaning. A clean seat is useful, but preserving its structure matters more.

Method 1: Vacuum Loose Soil with HEPA Filtration Before Wet Cleaning

A clean golf cart seat starts with dry soil removal. I use a vacuum with HEPA filtration before adding water or cleaner. This captures fine dust that ordinary vacuuming may release back into the air. Remove loose cushions when possible, then vacuum both sides and the seat base. Work slowly across seams, piping, and folds where sand collects. Use a soft upholstery attachment to protect vinyl and fabric surfaces.

Do not rush this step. I once wet-cleaned a dusty seat too quickly, and the trapped grit spread into a gray paste. It took extra brushing to remove. Move the nozzle in overlapping passes, especially around bolts, corners, and stitching. A narrow attachment can reach tight gaps, but avoid pressing hard against cracked vinyl. Check the surface afterward with your hand. If it still feels gritty, vacuum again.

Tips: Empty the vacuum canister before cleaning, and inspect the filter first. A clogged filter weakens suction. Keep the seat dry during vacuuming. For delicate fabric, test suction on a hidden area. I prefer several gentle passes over one aggressive pass. Photograph stains before wet cleaning, because their appearance may change after moisture is introduced. Avoid skipping the underside; dust often hides there. This small detail is easy to miss.

Methods 2–4: Clean Vinyl, Fabric, and Mold Using pH-Neutral Products

Golf cart seats collect sunscreen, dust, and dampness in their seams. Before cleaning, identify vinyl or fabric. Check a hidden edge for color transfer. Use a pH-neutral cleaner diluted according to its label. Avoid soaking the foam. Keep water controlled.

For vinyl, wipe loose grit with a dry microfiber cloth. Apply cleaner to the cloth, not directly into the stitching. Work in small circles around stains and piping. A soft toothbrush reaches the seam. Rinse the cloth often. Wipe away residue, then dry the seat with a towel. Do not rush. Harsh solvents can stiffen vinyl and fade its surface.

Fabric needs a lighter touch. Vacuum first, then blot cleaner into the weave with a barely damp cloth. Scrubbing may push sunscreen deeper. Lift moisture with a dry towel and leave the cart in moving air. Mold requires extra care. Wear gloves, avoid brushing spores into the air, and isolate heavily affected cushions. Use a pH-neutral cleaner only if the material allows it; never mix cleaning chemicals. I once underestimated how quickly damp foam could smell again. Now I check underneath the seat and repeat drying when necessary. Persistent mold or a spreading odor may need professional assessment, because surface cleaning cannot reach every contaminated layer.

7 Best Ways to Clean Golf Cart Seats and Upholstery? – Methods 2–4: Clean Vinyl, Fabric, and Mold Using pH-Neutral Products
Method Suitable Surface or Problem Recommended pH Materials Needed Cleaning Procedure Contact Time Drying and Aftercare Important Precautions
Method 2: Clean Vinyl Seats Smooth vinyl seat covers, backs, armrests, and non-porous upholstery About 6–8 Vacuum or soft brush, microfiber cloths, lukewarm water, mild pH-neutral detergent, soft nylon brush, dry towel Remove loose dirt first. Mix a small amount of pH-neutral detergent with lukewarm water according to the product instructions. Wipe the surface with a damp microfiber cloth, then gently brush seams and textured areas. Rinse with a clean, lightly damp cloth to remove detergent residue. Usually 2–5 minutes; do not allow the solution to dry on the vinyl Dry completely with a clean towel and leave the cart in a shaded, well-ventilated area. Regularly wipe away sweat, sunscreen, and dirt to reduce discoloration and surface buildup. Test the solution on a hidden area first. Avoid abrasive pads, strong solvents, concentrated bleach, and excessive water around stitching, foam, and electrical components.
Method 3: Clean Fabric Upholstery Cloth seats, removable fabric cushions, and woven upholstery that can tolerate light moisture About 6–8 Vacuum, pH-neutral upholstery cleaner or diluted mild detergent, soft upholstery brush, clean white cloths, spray bottle, towels Vacuum both sides and the seams. Lightly mist the cleaner onto the fabric rather than soaking the cushion. Work in small sections with a soft brush, blot loosened soil with a clean cloth, and wipe with a separate damp cloth if residue remains. For removable covers, follow the care label before washing. About 3–10 minutes, depending on soil level and the cleaner’s instructions Press dry towels onto the fabric to remove excess moisture. Air-dry fully before use; cushions should be dried on all sides to help prevent odor and mildew. Do not saturate foam or enclosed padding. Avoid vigorous scrubbing that can roughen fibers. Stop if dye transfers to the cloth, and never mix different cleaning chemicals.
Method 4: Remove Mold and Mildew Small areas of surface mold or mildew on vinyl or washable fabric upholstery About 6–8 Gloves, protective eyewear, mask suitable for moldy dust, vacuum with appropriate filtration, pH-neutral detergent, soft brush, disposable cloths, clean water, towels Move the cart outdoors or to a well-ventilated area. Wear protective equipment and remove loose growth without spreading it. Clean the affected surface with a pH-neutral detergent solution, gently agitate, and wipe away the residue. Repeat as needed, then clean nearby surfaces that may contain spores. Follow the cleaner’s label; commonly 5–10 minutes while keeping the surface damp Dry the upholstery completely in moving air and inspect seams, foam, and the underside of cushions. Correct moisture sources such as rain exposure, leaks, poor ventilation, or wet storage. Do not dry-brush mold indoors or mix bleach with ammonia, acids, or other cleaners. Porous foam or deeply contaminated upholstery may require professional removal or replacement, especially when mold returns.
General care: Always read the upholstery care label, test a hidden area, use the least amount of moisture necessary, and allow the seat materials to dry completely before operating or storing the golf cart.

Methods 5–6: Remove Stains and Disinfect with EPA-Registered Cleaners

Stains on golf cart seats need patience, not aggressive scrubbing. Blot fresh spills with a clean microfiber cloth before they spread. For vinyl upholstery, use warm water and a small amount of mild, pH-neutral soap. Work in gentle circles with a soft brush. Fabric seats need less moisture, because soaked foam can retain odors. I once scrubbed too hard and left a dull patch behind. That mistake taught me to test every cleaner on a hidden area.

For stubborn marks, apply the cleaner to the cloth instead of flooding the seat. Lift the stain gradually, then wipe away residue with a damp cloth. Disinfection requires an EPA-registered product labeled for the specific surface. Check its directions carefully, including the required wet contact time. The seat must remain visibly wet for that full period. Do not mix disinfectants with soap, bleach, or other chemicals. Ventilate the cart, protect nearby controls, and avoid saturating seams. Some products require rinsing after disinfection, especially on frequently touched upholstery. Not perfect, but safer. Let the seats dry completely before use, and inspect them for cracking, color change, or lingering moisture.

Method 7: Dry, Inspect, and Protect Upholstery Under IICRC S300 Guidance

After cleaning golf cart seats, drying is not a minor finishing step. It protects foam, stitching, and backing materials from trapped moisture. Under IICRC S300 guidance, use controlled airflow and avoid intense heat. High heat can stiffen vinyl or distort upholstery.

Position the cart in a shaded, ventilated area. Keep cushions separated when possible. Use clean towels to press moisture from seams and piping. Do not rub aggressively. Dry slowly. Check beneath seat edges, around fasteners, and inside creases. These areas often stay damp after the surface feels dry. I inspect the upholstery several times, not just once. Look closely. Watch for color transfer, loose threads, swelling, odor, or remaining soil. A small moisture meter can help, but it should not replace touch and visual inspection. My own mistake was trusting a dry-looking seat too early.

After the upholstery is fully dry, apply protection only if the material allows it. Test any conditioner or protectant on a hidden section first. The surface should remain natural, not greasy or slippery. Choose a product compatible with vinyl, coated fabric, or textile upholstery. Avoid heavy application near seat controls and electrical components. Record the material type, cleaning method, drying time, and visible changes. This creates a reliable maintenance history and helps identify problems before the next cleaning.

7 Best Ways to Clean Golf Cart Seats and Upholstery

Typical hands-on time per seat for a careful cleaning workflow. These are practical planning estimates, not mandatory IICRC S300 time requirements; actual times vary with soil level, material, ventilation, and moisture.

Method 7: Allow the upholstery to dry completely, inspect for remaining soil or damage, and apply a suitable protectant only after confirming material compatibility. Good ventilation and controlled moisture help reduce the risk of odor, staining, and microbial growth.

FAQS

How can I identify the correct cleaning method for a golf cart seat?

Check the upholstery material and sewn care label. Vinyl usually accepts mild soap and water. Leather needs suitable conditioner. Fabric often requires low-moisture cleaning. Care codes can vary. Never guess.

What should I do before applying cleaner?

Remove dust with a soft brush or vacuum attachment. Mix mild detergent with lukewarm water. Test it beneath the seat first. A small test area matters.

How should I clean vinyl seats safely?

Apply mild, pH-neutral soap with a soft cloth or brush. Use gentle circular strokes around seams. Wipe away cleaner promptly. Dry the surface in shade.

How can I remove stubborn stains without damaging upholstery?

Blot fresh spills with a clean microfiber cloth. Apply cleaner to the cloth, not directly onto the seat. Lift marks gradually. Avoid aggressive scrubbing. I once created a dull patch by scrubbing too hard.

How should fabric seats be cleaned?

Use minimal moisture because foam can retain odors. Avoid soaking cushions or flooding seams. Press moisture out with clean towels. Fabric may need professional advice when the material is unclear.

How can I disinfect golf cart seats safely?

Use a registered disinfectant labeled for the specific upholstery surface. Follow the stated wet contact time. Do not mix disinfectants with soap, bleach, or other chemicals. Ventilate the cart and protect nearby controls.

How should seats be dried after cleaning?

Place the cart in a shaded, ventilated area. Separate cushions when possible. Use controlled airflow, not intense heat. Check beneath edges, fasteners, and creases. Dry slowly.

What should I inspect after the seats appear dry?

Look for loose threads, swelling, color transfer, odors, and remaining soil. Touch hidden areas for moisture. A moisture meter can help, but it cannot replace careful inspection. I once trusted a dry-looking seat too early.

Should I apply a conditioner or protectant after cleaning?

Apply one only when the material allows it. Test a hidden section first. The surface should not feel greasy or slippery. Keep products away from controls and electrical components. Record the material, cleaner, drying time, and visible changes.

Conclusion

Learning how to clean golf cart seats and upholstery begins with identifying the seat material, such as vinyl, fabric, or coated upholstery, and checking the manufacturer’s care instructions. Start by removing loose dirt, sand, and debris with a vacuum equipped with HEPA filtration before applying moisture. Use pH-neutral cleaning solutions suited to the material, working gently to avoid discoloration, cracking, or fabric damage. Vinyl seats generally need light scrubbing, while fabric upholstery may require careful blotting and controlled moisture. Mold should be treated promptly with an appropriate cleaner and adequate ventilation.

For stains, test any solution on a hidden area first, then use gentle blotting rather than aggressive rubbing. An EPA-registered disinfectant may be used when sanitation is needed, provided it is compatible with the upholstery. After cleaning, rinse or wipe away residue as directed, dry the seats completely, and inspect seams, edges, and cushions for remaining soil or moisture. Following IICRC S300 guidance, finish by protecting the upholstery from sunlight, water, and repeated contamination through regular maintenance.

Aria

Aria

Aria is a dedicated marketing professional with a deep passion for innovative strategies and a keen understanding of our company's product offerings. With a wealth of experience in the industry, Aria excels at crafting engaging content that highlights the unique features and benefits of our......