Why Is My Golf Cart Charger Not Clicking On 2026 Top Fix?

Time:2026-09-24 Author:Amelia
0%

Why is my golf cart charger not clicking on? That quiet charger can signal a simple connection fault, a failed relay, or a deeper battery problem. The click usually comes from the charger’s internal contactor. It confirms that the unit recognizes the cart and begins its charging sequence. No click means the diagnosis should start before replacing expensive parts.

Industry guidance supports a careful approach. Battery University explains that charging depends on correct battery chemistry, voltage, and connection. Battery specialist Isidor Buchmann offers a practical warning: “The charger must match the battery.” That principle matters with 36-volt and 48-volt carts. A mismatched charger may remain silent, even when its display appears normal. The U.S. Consumer Product Safety Commission also emphasizes inspecting damaged cords, plugs, and battery connections before use. Small defects can create serious heat.

Golf-cart market reports from Grand View Research describe continued demand for electric carts and charging equipment. Yet market growth does not make every charger reliable. Dust near the receptacle, a corroded pin, or one weak battery can stop the charging cycle. Check the wall outlet first. Then inspect the charger plug, receptacle, fuse, and battery voltage. Do not guess.

The awkward truth is that “not clicking” is not a complete diagnosis. Sometimes the charger is healthy. Sometimes the batteries are too deeply discharged for automatic activation. A voltage meter, service manual, and careful testing provide better answers than repeated plugging. This 2026 guide explains the likely causes, safe checks, and repair decisions without treating every silent charger as a dead charger.
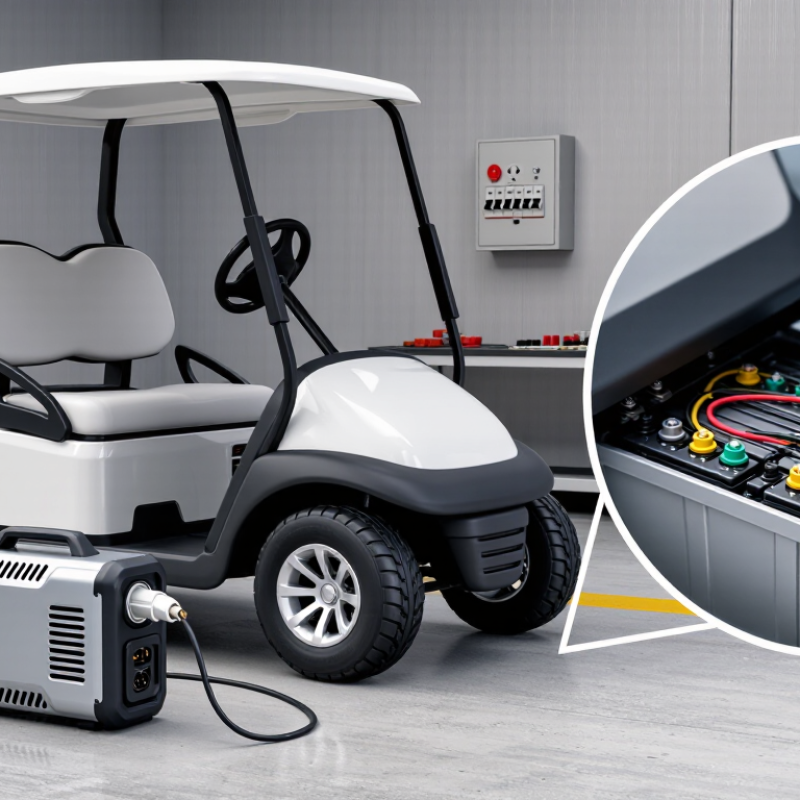
Why Is My Golf Cart Charger Not Clicking On 2026 Top Fix?

What a Clicking Golf Cart Charger Usually Indicates

Why Is My Golf Cart Charger Not Clicking On? 2026 Top Fix

A clicking golf cart charger usually indicates that its internal relay is attempting to engage. One click can be normal. Repeated clicking often means the charger detects unstable voltage, poor battery connection, or an unsafe charging condition. No click may indicate a dead battery pack, damaged power cord, blown fuse, failed relay, or an inactive safety interlock.

Lead-acid packs commonly need a minimum starting voltage before charging begins. Exact limits differ by charger design, so guessing can damage components. OSHA’s powered industrial truck guidance emphasizes ventilated charging areas and careful battery connections. NFPA fire research also identifies electrical equipment and battery charging as important ignition risks. Therefore, inspect heat marks, melted insulation, corrosion, and unusual smells before testing. Never bypass a safety switch. That shortcut may appear effective, but it removes protection.

Tips: Switch off wall power first. Clean each terminal with the correct brush, then tighten loose connections. Measure total pack voltage with a calibrated multimeter. A reading far below the charger’s rated voltage deserves professional testing. Check the receptacle and charger plug for looseness. If the relay clicks every few seconds, stop charging and test individual batteries. Uneven readings can reveal one weak battery. I have seen owners replace the charger too quickly; sometimes the real fault is a cracked connector or a battery with internal damage. Certified service data, not one symptom, should guide the repair.

How to Check the Charger, Outlet, and Power Connections

When a golf cart charger does not click on, check the power path before blaming the charger. Start outside. Look closely. Plug a lamp into the same outlet and confirm the circuit breaker has not tripped. A silent outlet is not a charger problem. Inspect the cord for cuts, flattened sections, or darkened plug blades. Loose wall connections can create heat and unstable voltage.

Then examine the cart-side plug and receptacle. Clean, dry contacts should fit firmly. Corrosion or a pushed-back terminal can interrupt the charging signal. Confirm the charger matches the cart’s battery voltage and battery chemistry. Some chargers will not start when the battery pack voltage is extremely low. In that situation, repeated plugging may not help. My first assumption is often wrong; the connector is frequently the real failure point.

Electrical safety deserves attention. The National Fire Protection Association’s Home Structure Fires report, covering 2016–2020 U.S. data, found electrical distribution and lighting equipment involved in about 46% of home fires. That figure is not specific to golf carts, but it supports careful connection checks. Do not bypass a fuse, interlock, or safety switch. If the outlet works but the charger remains silent, a qualified technician can test input voltage, internal relays, and battery-pack voltage. Unplug before inspecting. Never open the charger while energized.

How to Test the Golf Cart Batteries and Charging Port

When a golf cart charger is not clicking on, test the batteries and charging port before replacing parts. A silent charger often detects low voltage, poor connections, or a damaged port. Park the cart on level ground, switch it off, and wear eye protection. Disconnect the charger from the cart before inspecting anything.

Use a digital multimeter on each battery’s terminals. Compare the readings with the voltage printed on the battery case. A deeply discharged battery may show an unusually low reading. Test every battery, not just the first one. Look for swollen cases, cracked housings, loose cables, or white corrosion. Clean minor corrosion only after disconnecting the battery cables. If one battery differs sharply from the others, professional testing is safer. I once blamed the charger, but a loose terminal caused the real problem.

Tips: Check the charging port for bent contacts, moisture, dirt, or heat marks. Gently move the plug while observing the port, but never force it. With the cart off, test for continuity only if your charger manual permits it. Some ports include a safety switch or temperature sensor, so bypassing one can create a serious hazard. Check the port wiring for loose crimp connections. Take a clear photo before removing wires. This prevents a careless reconnection. If the batteries test normally but the charger still makes no click, have a qualified technician test the charger’s relay and output circuit.

Why Is My Golf Cart Charger Not Clicking On? 2026 Top Fixes: How to Test the Batteries and Charging Port

Check How to Test What the Result May Mean Recommended Next Step
AC power supply Plug a lamp or meter-tested device into the same outlet. Check the charger’s AC cord and any accessible breaker or GFCI. No power at the outlet can prevent the charger from starting or making a relay click. Restore power or reset the GFCI or breaker if safe. Do not use a damaged cord or outlet.
Charger plug and connections With the charger unplugged, inspect the plug and receptacle for loose pins, corrosion, dirt, or heat damage. A poor connection can interrupt the low-voltage signal or charging current. Clean only accessible, unpowered contacts using an appropriate method. Have damaged or burned parts repaired.
Battery-pack voltage Set a digital multimeter to DC volts and measure across the pack’s main positive and negative terminals. Observe polarity. A deeply discharged pack may be below the charger’s detection threshold. Exact limits depend on the charger and battery type. Compare the reading with the battery and charger specifications. Do not try to bypass a low-voltage safety cutoff.
Individual lead-acid batteries After charging has stopped and the pack has rested, measure each battery at its terminals. For a 6-volt battery, a fully charged resting reading is commonly around 6.3–6.4 V. One battery reading substantially lower than the others may indicate an imbalance or a failing battery. Have the batteries load-tested and checked as a set. A voltage reading alone cannot confirm battery capacity.
Charging-port contacts Unplug the charger and cart. Inspect the port for loose, recessed, corroded, or heat-damaged contacts. Consult the cart wiring diagram before testing polarity. A damaged port or open connection can keep the charger from detecting the battery pack. Arrange port or wiring repair if contacts are loose, discolored, or damaged. Avoid bridging contacts with a tool.
Cart safety interlock Check the owner’s manual for the required key, run/tow, or other charging position. Make sure the cart is stationary and the key is off if specified. Some carts use an interlock that prevents charging when the controls are in the wrong position. Set the controls as directed by the cart manufacturer, then reconnect the charger.
Charger indicators and sound Connect the charger in the order given in its manual and note any lights, error codes, fan activity, or relay sound. No indicator may point to a power, connection, fuse, or charger fault; an error code may identify a battery or temperature issue. Use the charger’s fault-code guide. Do not assume that a click is required on every charger model.
Battery type and temperature Confirm that the charger is designed for the installed battery chemistry and voltage. Check the battery maker’s permitted charging-temperature range. An incompatible charger or out-of-range battery temperature may prevent charging or trigger protection. Use a charger matched to the pack. Let batteries return to an approved temperature before charging if the manual requires it.
Fuses and serviceable protection devices With power disconnected, inspect only fuses or breakers identified as user-serviceable in the cart or charger manual. An open fuse or tripped breaker can interrupt the charging circuit. Replace a fuse only with the specified type and rating. If it opens again, stop and have the circuit diagnosed.

Safety note: Wear eye protection when working near lead-acid batteries, remove metal jewelry, and keep sparks and flames away. Disconnect power before inspecting wiring. If you are unsure how to test the pack safely, contact a qualified golf-cart technician.

How to Inspect the Relay, Fuse, and Internal Charger Parts

A golf cart charger that stays silent may have a fault in its control path, not a dead battery. Park the cart, switch it off, unplug the charger, and check the outlet before opening anything. Inspect the plug and cable for heat marks, cracked insulation, or loose pins. Then check the relay and fuse using the charger’s wiring diagram; a blown fuse may point to a deeper short, so replacing it repeatedly is not a fix. A multimeter can confirm continuity, but never bridge relay contacts to force charging.

Listen for a relay click only after reconnecting the system as instructed. No click can mean a failed relay, a broken wire, or a control board that is not receiving the correct signal. Check for corrosion around terminals and look for a swollen capacitor or burnt odor inside the charger. Stop if components are damaged. Charger service guidance under UL 1564 treats these units as electrical equipment requiring proper protective design; that is a reason to avoid live internal testing without training. My inspection notes would include the fuse rating, measured input voltage, and relay response. Easy to forget.

A quiet charger is not enough evidence to condemn the relay. Verify the cart’s battery voltage against its specified system voltage, then compare the charger’s input and output readings with its service documentation. IEEE 1188 provides maintenance guidance for stationary lead-acid batteries, including inspection and electrical measurements, but it is not a golf-cart charger repair manual. If the fuse opens again or the relay chatters, disconnect power and have a qualified technician test the internal circuit.

Why Is My Golf Cart Charger Not Clicking On? 2026 Inspection Guide

A charger may not click when the battery pack voltage is too low, the fuse is open, the relay contacts cannot close, or an internal control component has failed. The chart shows nominal pack voltage compared with an approximate lead-acid full-charge target based on about 2.45 volts per cell. Actual limits vary by charger and battery type.

Before opening the charger, verify the AC outlet, inspect the fuse for continuity, and measure the complete battery pack with a DC voltmeter. A healthy fuse should show continuity and nearly zero voltage drop. If the pack voltage is present but the charger still makes no click, inspect the relay coil, relay contacts, wiring connections, and internal control board. Disconnect AC power before testing internal parts.

When to Repair or Replace a Golf Cart Charger in 2026

Why Is My Golf Cart Charger Not Clicking On 2026 Top Fix?

When to Repair or Replace a Golf Cart Charger in 2026

A silent charger does not always mean it has failed. Some models do not click when connected, so check the manual before treating silence as a fault. Park the cart, switch it off, and inspect the plug and charging port for looseness, corrosion, or heat damage. Confirm the outlet works with another device. If the charger has indicator lights, note their pattern; it may point to a poor connection, low battery voltage, or an internal fault. Never open the charger casing unless you are qualified to service electrical equipment.

Tips: Check cables for cuts or flattened spots. Stop using a charger that smells burnt, gets unusually hot, or shows melted plastic. A clean connection can fix a simple issue, but do not force the plug.

Repair may make sense when the charger is relatively new and a technician finds a replaceable cable, connector, or fuse issue. Ask for a written estimate and compare it with the cost of a compatible replacement. Replacement is often more practical if the case is cracked, water has entered, or repairs approach the price of a new unit. Match the charger to the cart’s battery type and system voltage. A mismatch can damage batteries. I have seen people replace a charger too quickly; checking the outlet and connections first can save money, though it will not solve every silent-charger problem.

FAQS

Why might a golf cart charger stay silent?

Low battery voltage, poor connections, a damaged charging port, or an internal control fault can prevent charging. Silence alone proves little.

How should I check the batteries?

Switch off the cart and unplug the charger. Use a digital multimeter on each battery’s terminals, then compare readings with its printed voltage.

What battery damage should I look for?

Check for swollen cases, cracks, loose cables, and white corrosion. One battery reading far below the others needs careful attention.

What should I inspect on the charging port?

Look for bent contacts, dirt, moisture, heat marks, and loose wiring. Never force the plug. That can make things worse.

Can I test charging-port continuity?

Only do so if the charger manual permits it. Some ports contain safety switches or temperature sensors. Do not bypass them.

What can a silent relay indicate?

A failed relay, broken wire, or control board fault may prevent a click. But a quiet charger does not confirm relay failure.

How should I inspect a fuse and charger interior?

Unplug the charger first. Check the fuse using its wiring diagram, and do not replace it repeatedly if it blows again. Stop if you see burnt parts or smell burning.

What should I do if basic checks find no problem?

Have a qualified technician compare battery voltage and charger readings with service documentation. Internal testing can be hazardous. I once missed a loose terminal.

Conclusion

If you are wondering, “why is my golf cart charger not clicking on,” the sound usually comes from an internal relay responding to the cart’s battery voltage. A silent charger may indicate a dead outlet, loose power connection, damaged charging cable, incorrect plug contact, or batteries that are too weak to activate the charging cycle. Begin by checking the wall outlet, charger cord, connections, and charging port for visible damage, dirt, or corrosion. Always disconnect power before inspecting components.

Next, test the battery pack and confirm that the batteries provide enough voltage for the charger to recognize the cart. If the batteries test normally, inspect the port, relay, fuse, and internal charger parts for signs of overheating or failure. A qualified technician can safely perform electrical tests and identify hidden faults. In 2026, repairing a charger may be practical when only a fuse, relay, cable, or connection has failed. Replacement is often better when the unit has severe internal damage, repeated faults, or repair costs close to a new charger.

Amelia

Amelia

Amelia is a seasoned marketing professional with a wealth of expertise in our company’s core offerings. With an unwavering passion for driving growth and innovation, she plays a pivotal role in shaping our marketing strategies and enhancing brand visibility. A key aspect of her responsibilities......